Language Editor
Ybex Clipboard's interface has been translated into more than a
dozen world languages, but if your native language is not on the
list, you may easily add the necessary support for it. Your
generosity will not only be acknowledged through the gratitude of
other users, but also through an offer of extended Ybex account
privileges from A!K Research Labs.
Please consult the following guide to translate Ybex Clipboard
into your native language:
- Make sure that the language into which you are going to
translate the Ybex Clipboard interface is not already present in
the list of supported languages.
- Contact us at xinbox.com/aklabs, and inform us of your decision
to perform a language translation.
- Start translating by going to Settings and clicking "Add/Modify
Language".
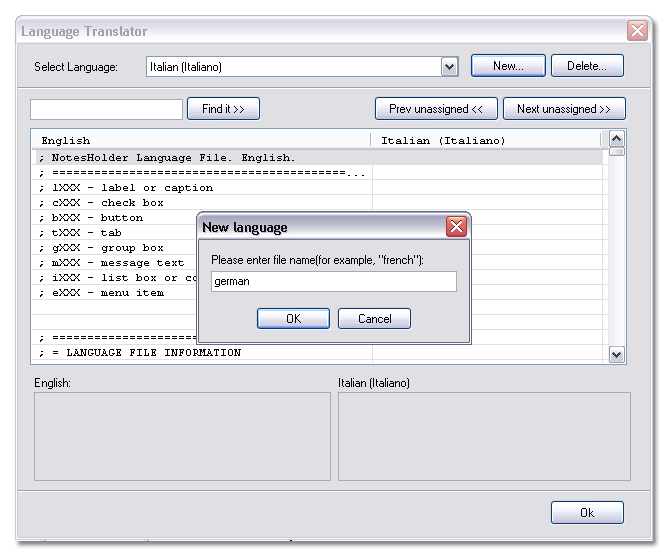
- Press the New button, and in the pop-up window type the name of
the file in which your translation will be stored. For the name of
this file, we strongly recommend that you use the English name of
the language into which you are going to translate the Ybex
Clipboard interface.
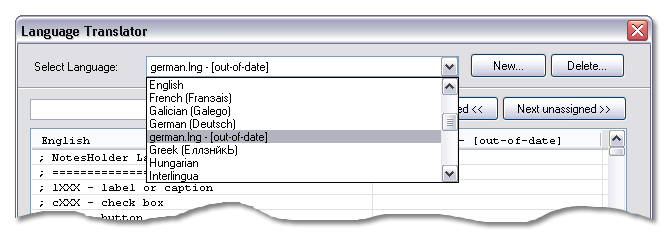
- Select the language file you created during the previous step,
and start translating the lines of the interface.
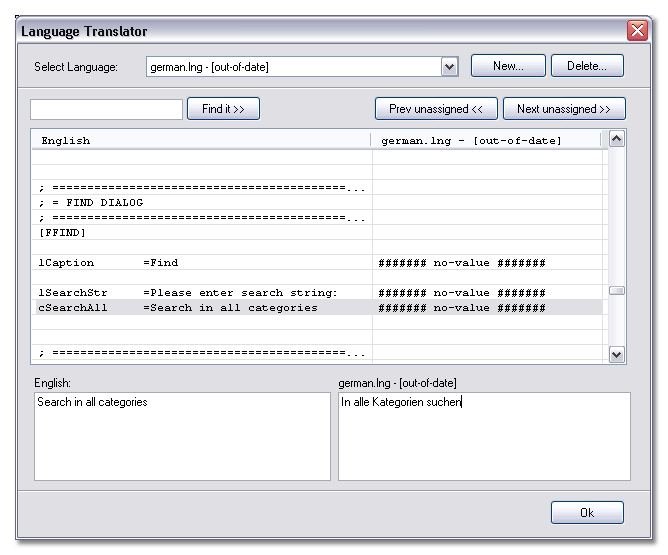
- Select all strings in the language file one-by-one, read the
English variant in the left-hand column, and enter your translation
into the right-hand portion of the input field. Try to translate
each string such that it will not be much longer than its original
English counterpart, because it may not fit into the sections to
which it is assigned in the program's windows.Click on "Prev
unassigned" or "Next unassigned" to find the previous, or next,
respective non-translated string.
- Specify your name (in English) and your contact e-mail address
(or xinbox.com account link) in the corresponding fields of the
first LANG_INFO section of your language file. Next, specify first
the name (in English) of the newly-translated language in the Name
line, then specify (on the same line, in round brackets) the
newly-translated language's "native" name; see examples below. Now
select the forBuild line and specify the version of Ybex Clipboard
in which your translation data was entered. To do this, simply
press the "Set Current" button.
- Close the Language editor, and select the language file you
created in the program settings.
- Now open all windows of Ybex Clipboard one-by-one, and
determine whether any of the strings that you have translated do
not fit into the space(s) assigned for them. If you discover any
instances of this, open the Language Editor again and shorten any
strings that do not fit. If the exact translation still does not
fit into the assigned space, make your string shorter anyway,
leaving the original meaning.
- When you have completed the above process, please send the
created language file to xinbox.com/aklabs. You can find the file
in the Program Files\Ybex Clipboard\Languages folder. If your
translation is acceptable, we will upgrade your account status with
us from Ybex Free Account to Extended Account, and your language
file will be included in the next update of the Ybex Clipboard
application distribution package.